Monday, July 29, 2013

Transitional Dry Stone Elements


        Transitional Dry stone elements in the landscape help us read and move through it more smoothly, flowing from one point to the next. They strengthen connections between plantings and hardscaping, indicate relationships with materials and pattern languages, provide us with contrast, give us direction physically & visually with destination features, as well as providing high quality dry stone structures. A landscape may require stairs, a dry stone retaining wall, an arch, a dry stone fence, or any number of other stone elements to solve an existing transition. Each site is unique to the landscape, design parameters, materials, and budget.


In this simple transition it is fairly obvious that we needed a retaining wall to hold back soil as well as creating a clean boundary between the driveway and the landscape.

We built a 4' tall by 60' long dry stone retaining wall using a Montana Slate, and cleaned up the hillside of blackberries. The cedar  was critically damaged by previous excavators.


       Some transitions are awkward grade changes that require very clear traffic control solutions coupled with creativity and beautiful stone work. This grade change over 11' was so strong that we decided to break the stairs into two separate landings.


The large boulder is Olivine and the low dry stone retaining wall is Montana Slate.

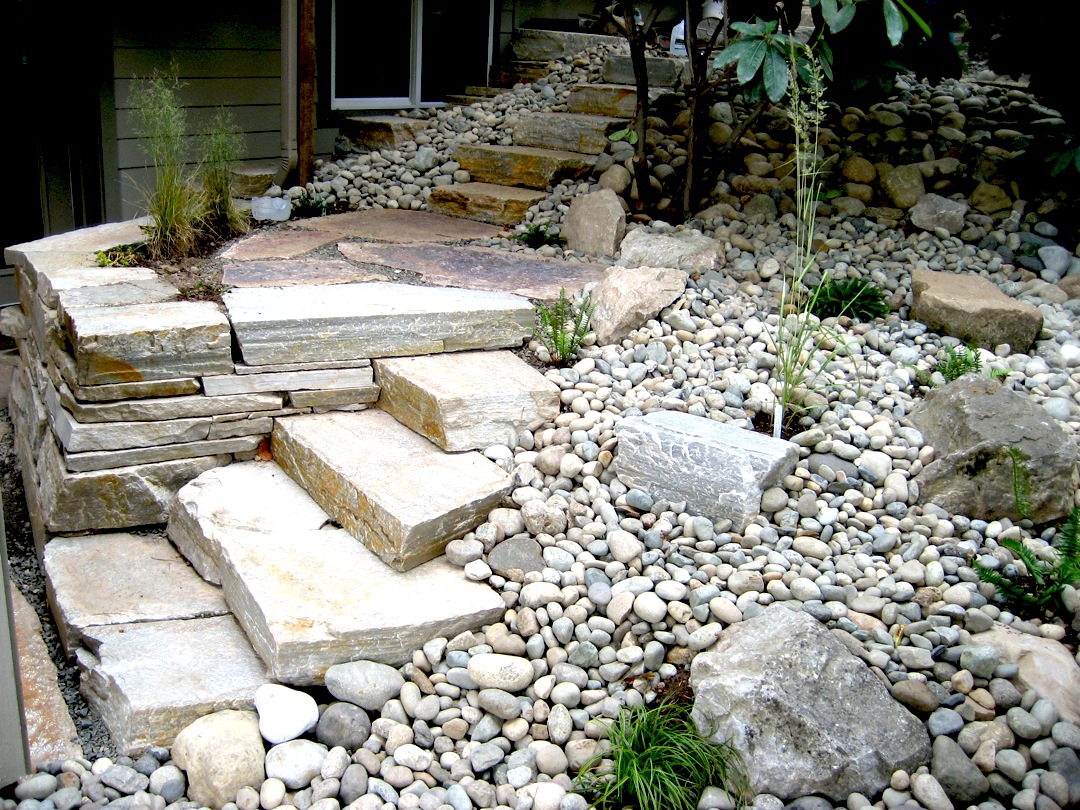
This project needed stairs, dry stone retaining walls, flat work, and raised parking spots in the front of the house. This was the most interesting transitional element to build because we were able to design the dry stone retaining wall to have a corner with stairs, that at 24" in height also functioned well as a bench.
Here our dry stone retaining wall turned into stairs to provide a transition between the patio area and the upper gardens


Some of my favorite sites to work in are in tight city lots with steep slopes. 

Transitional elements in the landscape can function in a multitude of ways... 

-They can provide emphasis & contrast between spaces....
In these cases between the driveway and the entrance .


Some of these elements are more artistic and architectural in nature and visually draw us in as destinations in the landscape.


This 11' tall Inukshuk weighs 18 tons. My friend Cameron Scott and I built this for the Seattle Flower and Garden Show in 2008. People flocked here to have their pictures taken in front of it.
This large piece of granite we used for a wall end  was a  great detail for the stairs, landing and bench.
This is a dry stone fence I rebuilt in Shaker Village Kentucky . I loved  how the small  lunky detail allowed for animals and water to pass through, as well as accommodate the roots of the tree.

This is a detail from a dry stone Gothic Arch Cameron & I built for the same display that year. Again people were drawn to this detail instinctually because of the importance placed on the transition between landscape and pathway. 


All of these elements are dry stone structures. I often find myself thinking lineally as just building as a dry stone waller and landscaper, but there is so much more to these structures than just that. 

Stone... structure... function... landscape... portals... man... stories... transitions...

I think the symbolism is endless depending upon what thread you head down along that path.


Monday, January 21, 2013

Angled or Wedge Retaining dry stone wall


It all started with an unruly slope, bad access to the street from the house, and a poorly built dry stone wall......


We started by taking up the concrete path through the trees to the street, and removing the poorly built limestone dry stone retaining wall for many reasons:
1) It was failing, 2) It had no foundation, 3) The stones were improperly sized,
4) and it was ugly.

 We had to strip it out to build a new one, so we figured we would change the grade of the lower area at the same time to make it more functional.


I did a site drawing for our client (see earlier blog post October 3, 2011)proposing new walls, stairs, a gothic dry stone arch, and pathways. I love to draw, but not super tight....

We took 25 yards of soil out from this area to bring it to the proper grade before we
we began our wall.

      Our client wanted this wall to stand out distinctly from the other work we had done, yet tie in with the same language. To do this we used the same Montana Slate materials, from a different quarry there, as well as the same stone from the dry stone retaining wall along the driveway. Functionally I needed to build stairs down from the deck to a path, which evolved to a dry stone arch hidden in the trees, to another set of stairs-which became cantilevered  to this wall.

         I had found a large beautiful piece of granite(at Marenakos in Preston Washington) for the right wall end by the stop sign. It was 9' long by 16" tall rising to 48". Our client loved this idea in the entirety and we began some 12 months ago.

          So the wild thing about this project was the staging of  80-90 tons of stone in this space, plus room for machinery, building, access to the mailbox, and keeping the city of Bellingham happy with our water runoff from the site into storm water drains. We got to know the city people quite well working here.
         
          I decided to build a set of stairs down from the deck first to gain access to the slope safely every day. From there we located the arch site in the trees, established a path to the arch, and built the 2' tall dry stone retaining wall along the path which connects the arch to the stairs. To figure out where the stairs where the cantilevered stairs were going to start, I had to set the large piece of granite and establish the line of my dry stone retaining wall with it's base course.
This picture is great because it shows our 100"long treads, wall stones for the lower wall, and in the back of the pile, a granite boulder we moved from the landscape to split into 3 stones: 1 for a 2 ton base stone for the column of the arch, and the 2 other smaller pieces for gate posts(stainless steel forged gate designed and fabricated by Altility here in Bellingham).....


  So once that line was established we started with the cantilevered stairs and the retaining wall. I knew we needed to get a lot of big material up on the slope by hand, and with machinery, for the arch so we started building the cantilevered stairs up to the arch.


*Side note here...
This is the medium long version of this whole scope of work for this front area by the way..... Which lead up to the final angled/wedge dry stone retaining wall.

After we had built all those details over some period of time, we could finally begin our wall. We needed the cantilevered stairs, and dry stone retaining wall  in to function as our wall end on the left.

So we followed our rules......Each stone in these structures has these rules applied, and then with the angled/wedge wall with get to apply the exceptions!

It begins like all dry stone walls built to DSWA standards...
1)Length in for all stones
2)One stone over two, and two stones on one
3)Largest stones go one the bottom of the wall
4)Stones are laid level and solidly
5)Build to the string line, and heart well!

So we started with 5-6 pallets of 2-3" thick Montana Slate. We set up our wooden bankers to begin squaring up the stones, and sorting for the build.

Before we could start building this I had to decide what angle we were going to lay the stone to. I didn't want it to look like it was slipping, or that it was laid casually. We decided a 60 degree angle looked the best and committed to it for 50' long by 4' tall....
You can't 'see the forest for the trees' when you start a wall and this is really when everything seems off.

And then BAM! It finally snaps together once a pattern language is established!
From the side you can see the technique...
Another beautiful detail about these walls is the top course. It creates a very beautiful line...

So here we are almost done.... silt fence still up, bankers have moved with us down the wall, patterns mostly revealed, seasons changing...


So here is how we end this wall. I had the granite stone on top for
about 12 months. It is about 30" long into the wall.

The view from the deck above the wall.

The finished wall from the street. What a journey worth taking!

To build these features, I needed the collaborative help of many people, but specifically I need to thank these Craftsmen that worked closely with me ... Kevin Hettick, Gary Henderson, John Grablewski, Sean Donnelly, and Garrett Thornton for helping to realize it.

Time to move on to the back yard and other details with stone....


All images copyright of BorowedGround LLC@
                                      

Saturday, August 4, 2012

Dry Stone Gothic Arch project


Dry Stone Gothic Arch

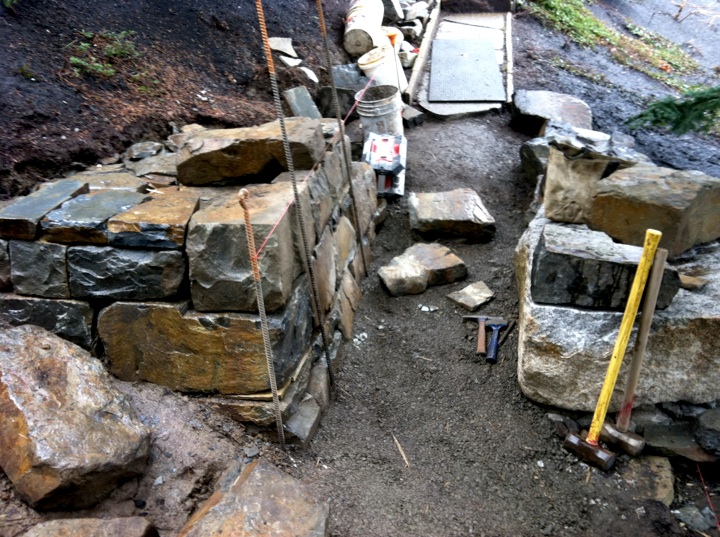
I have to start here with these cantilevered stairs before I talk about the arch. These wind up the hill to the arch with the retaining wall eventually turning into a low fence/ bench seat before the arch.


Add caption
When I designed this detail I wanted our stairs and retaining wall to wind like a ribbon up the hill-around the trees-into an arch- and then into a low 24" tall retaining wall that ran up hill to another set of stairs.


This is my foundation on the left side for the dry stone arch. It is about 24"tall and the beginning of the low dry stone retaining wall. The piece of granite on the right came from a large boulder on site that we split down, leveled off, and shot up the hill with an extension fork lift. It weighs about 2 tons.
On a side note here are the other 2 pieces of granite we used for gate posts up by the house. We are lucky to have a black smith in Bellingham to collaborate with, Arron Loveitt of Altility.
altilityartstudio.com

Here is the gate he designed. It covers up the gas meter, and invokes a sense of private space. This granite split beautifully using feathers and wedges into three  usable pieces. 

You can see the retaining wall taking shape in context to the wall/arch/column.
At about this point I wanted to add another detail for our client in this arch for a finer detail. We wove in an Ogee Arch cut from Penn. Blue stone. On the lintel we cut in the phrase... 'Land of the Free & Home of the Brave'. It looks beautiful. We also cut in holes for recessed lights within it. What is also nice about adding this detail is that it gives the arch another column that accentuates the voussoirs(the stone for the corners of the gothic arch).


We finally got the column up to height to insert our form.
Up with the form, and the scaffolding! You can see the top step and bench wall all tied together before we cut our cap stones and installed them. All these stones are hand carried up the hill by the way! We spend a lot of time laughing at each other under some absurdly heavy stone that we carry up each day. 80% of the stones find a home in the project as a wall stone... the rest wind up as hearting(fill stone) having fractured under our hammer....

Here is a detail of the Ogee Arch. You can't read the inscription because we just rinsed the wall down.
Here we are looking down from the upper path, by the gate. We installed the arch here in the clients landscape so they would have visual access to it from the bedroom windows.


The arch is coming up nicely, and I am super happy with how level I have been able to keep my column courses. At almost 7' in height it barely moves when we push on it from the side. We put our cap stone on the low bench/fence wall. It is not tied into the arch at all. Life on the scaffolding has been challenging to say the least.
So...
Here we are as of yesterday. I am cutting cap stone for the top of the wall for more weight, to keep water out of the wall, add height and remove the neighbors landscape from view. I am planning on adding a couple layers of turf flipped over for the top to plant native plants on. It should look older and pretty cool when we are done....
I think we are at about 7' or so  below the caps.

And we are still looking for our key stone for the arch....

We found it sitting right by our truck!
Here Gary Henderson is drilling holes to split off 1/3 of this boulder
to generate enough material we can continue to split into our keystone.

You really need to split off a larger chunk than you need, so as you continue to shape it, you have enough mass on the material you want to remove to control it evenly. That was our split with 'feathers and wedges'... 5 setups to reveal the key stone. Patience and consistency lead to great results.

View from the cantilevered stairs looking up at the arch.

So there we are! The arches turned out great. What a journey! I love that we can take a few basic rules-for dry stone walling, apply exceptions to those rules & discipline, and build exceptional details in the landscape.
Here we are looking the other direction. I love how it feels like two totally different arches from each side. Essentially they are, as visually you have totally different language in the landscape that informs the arch and the viewer.

I like how dramatic this is... subtly revealing other details.


StoneFest 2012 at Marenakos!

StoneFest is right around the corner! I love participating with all these stone centric people!
This year should be fun as we have lots of great instructors and projects for everyone to work on.


StoneFest
HOME
ABOUT
STONEFEST 2012
FAQ
PAST FESTS
LINKS
CONTACT

DOWNLOAD DAILY SCHEDULE HERE
ONLINE REGISTRATION FORM HERE
DOWNLOAD CATALOG BROCHURE HERE


REGISTER NOW!!

StoneFest 2012 Online Registration Form

DOWNLOAD CATALOG BROCHURE HERE (5MB)
(includes registration forms)


DOWNLOAD DAILY SCHEDULE HERE
Marenakos Rock Center425.392.3313
info@stonefest.org
Alexandra Morosco, director
360.579.2591


DOWNLOAD DAILY SCHEDULE HERE
ONLINE REGISTRATION FORM HERE
DOWNLOAD CATALOG BROCHURE HERE
back to top
PO Box 478 Preston, WA 98050 • 425.392.3313 fax 425.392.7332 • info@stonefest.org
Marenakos Rock Center

The Chapel Project 2019-202?

The Chapel A replica of a 14th century Irish chapel-St. MacDara's island Mid-winter of 2018/2019 a client contacted me in Sat...