Showing posts with label granite. Show all posts

Thursday, January 16, 2020

Curiosity & Creativity


Our relationship to stone starts with need, function, safety, shelter, tools, longevity, and is evolved through the masons skill, creativity, and curiosity. Anyone who mindfully sets one stone upon another is a mason while they apply themself and learn the basic laws that apply stone. 

These are my children when they small...with no adult ideas upon their brains for what they might do with stone. Pretty cairns, flowers, cars, and many other things appeared before we built a little wall.
Finding similar shaped stones for the petals of a leaf, finding wheels for the car, or making a pointy stone out of a soft piece of shale for the letter A. Children are all creativity and curiosity. It is a beautiful thing to watch young children explore materials in nature. The simple stick becomes a wand that transforms the world around them and stories unfold.

Staying connected to being curious by nature as we age can be challenging....
I find myself daydreaming looking at stone in the simplest of ways..

A day at my aunts house in Arizona and the first thing I see in her garden is this giant quartz crystal....
I immediately think of it harnessing energy and directing at someone to heal...
An ancient healing tool.


A roughly shaped 'heart stone'....
A heart is a heart...they always make me pause.


Putting together many to create one..


Curiosity and creativity have been the two favorite elements to apply to the needs of customers. I never know what will be in the piles of stone that I get delivered by the dump truck or in pallets.
Yet structure and function have to exist. When I apply curiosity and creativity structures change. 


This is a mini Scottish Broch I made for a client in Burlington Washington in 2017
with granite. 35 tons 9' tall, 15' wide


They have a soul. The hand of man is revealed...You could give give 10 different masons the same materials, parameters, site, and materials and the Broch would look completely different each time. We all have our own unique approach to how we build and that I think this founded in our childhood relationship with curiosity and creativity.


I started Borrowed Ground in 2007. I was curious about stone. It was this amazing raw material that was totally different from one type of stone to another. I had to apply and hone my skills through being creative, while being willing to fail until I was successful. 

Wednesday, September 9, 2015

Stone by stone...


Each project we start begins with one stone. It sets the tone for all others that follow in response to it's mathematical proportions and character. Generally I like to start with a good sized stone and build out in enough directions where my crew and I can see where we are going. 


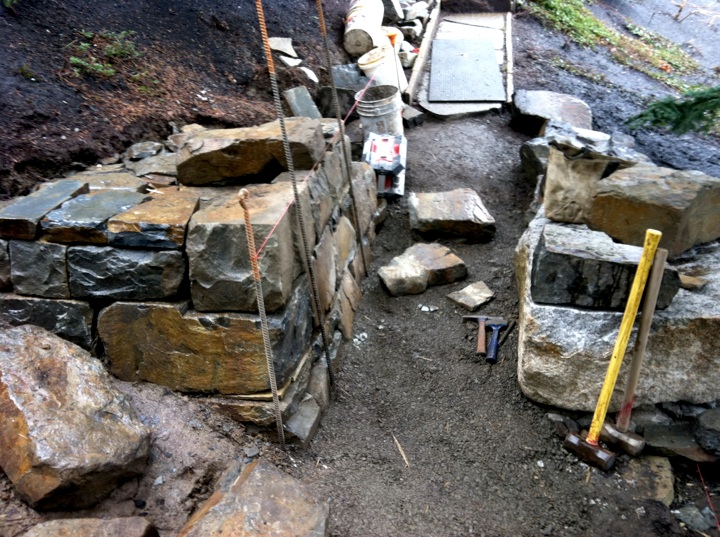
On this project I knew we were building a 6' tall dry stone retaining wall with granite from Idaho and Washington state. As per our engineer we dug down into bedrock 12" to toe in our foundation into the Chuckanut sandstone. 12" of foundation stone which I still had to build up another 9" to the top of our foundation stone! On top of that it was about 3-4' wide for the length of the wall. Aside from all the tonnage and work never to be seen... I knew we would have three sets of 'through stones' in this wall and decided to play with that detail starting with the large stone I craned into place.
Through Stones provide bonding deeper into retaining walls, and transfer laid to the back face of dry stone fences....

In this case...looking down on our wall, you can see our wall stones are about 12" deep on average. Our Through Stones are 30-36" long and overlap the stones in the back of our wall. They are set in modern dry stone retaining wall and dry stone fence construction at 18" in height, and every 36" in length of the wall. This repeats as you build up to what ever height. It is a working stone that every trained and certified dry stone mason will use in their construction. They add decades to the life of structures.

Usually we set these flush to the face of the wall. I wanted this length of wall to have a bit of character very subtly and calmly. 

From here we wrapped around the corner and built a water feature into the wall.

And so stone by stone you see the pattern language revealed with the wall stones, through stones, cap stones, and even the large boulders which have the 'feather and wedge' drill holes left on the faces. The first stone I set was the large boulder below the set of three 'through stones'.


From here we needed to build stairs up to the top of the property for another intimate patio.

This image is to the right of the water feature. The first few steps were hand carved into the boulder. Our outdoor fireplace is mortared Montana Slate with tight joints, and a granite cap. We used a different tone our out door fireplace to set it apart from the other features.


And up we go around the water feature to the upper patio. Staging for this project is complicated, tight, and slow for installation as we work from a platform on top of the pond cutting our stones to fit for the wall above. Room for 2 people max here.


When we started developing this space in the backyard and collaborating with the client, engineers, and plant landscapers we knew we wanted the wall, a water feature, an out door fireplace and BBQ, a small patio, and a main entertaining area. For us at Borrowed Ground, we build unique spaces in natural stone wether it is mortared, or a dry stone structure. Our crew fluctuates a bit from year to year, we travel around the state of Washington(even the islands), work in a wide range of styles, and continually strive to exceed our clients expectations. Not all of our jobs are of this scale. We work the same for each customer creating unique spaces that are fundamentally built to the highest quality of masonry standards, and artistic detail stone by stone.


Monday, September 2, 2013

Foundations for walls & related elements....


 Dry stone fence, limestone, Kentucky. Image by Mark Jurus.
Why do these dry stone structures last so long? Luck? Lack of exposure to extreme elements? Freeze thaw not present in certain elements????

There are as many theories as there are people who have put one stone upon another. You can go to school and be instructed to build a wall to certain standards of quality. You can also build walls with a naivety to any of those rules. Both walls will have have certain truths that endear them to their own longevity. A friend of mine has said many times in my presence...."a poorly built wall often lives way longer than it should...". They do... wether they are pleasing to look at, or chaotic and terrifying in their relationship to the site.

For me it always starts the same for a new wall. I have to slow down and assess the landscape. This often takes me a while as I try and picture a new wall working in the landscape for the client as they intend it to. Eventually we come to 'yes' for the landscape/client/and myself.

After the site is assessed, the wall is defined to height-length-materials-thickness-drainage... you begin work. You excavate for your foundation. Foundations are to me one of the more beautiful details that hidden within the wall. Many times the only time a foundation is seen by the client is as a line item outlining our scope of work, or by the subtle edge that protrudes 3-4" proud beneath the face of the dry stone retaining wall or fence.

The foundation is, to me, one of the most important details in walls. There is a reason we use that phrase 'solid foundation' in a hundred different analogies in life. We don't want what is above grade to shift, or become insecure because of what is at our feet is not solid. Foundations vary incredibly according to region, site conditions, materials, engineering specifications, surcharge of slopes, and also personal experience of the contractor.

 The Dry Stone Conservancy in Kentucky, when I went through their 'Boot Camp' program to obtain my basic certification through them, said that by adding a foundation to our walls of 4-6" thick stones, that protrude 3-4" on the face of dry stone retaining walls/and the same for dry stone fences, will add an estimated 25-50 years for a walls longevity. The foundation! I think this is where I fell in love with working with stone and thinking about the quality of materials and the relationship of the craftsman to a deep timeline long after they mason is gone.


I'll use this site as an example because it was relatively easy.... It is totally clear why the client wanted a 48" tall dry stone retaining wall along their driveway. We chose a blocky Montana slate to work with.....

After digging down, and cutting back into the hillside we realized we were sitting on our local sandstone bedrock. We also had a drainpipe we could remove excess water from below and behind the wall.
This was an easy foundation because we could build right up off the sandstone. We did three things. One was cutting the grade of the sandstone level, and running the back of the wall a few degrees below the front. And the second was to install a 4" drain pipe behind the wall, with a clean out under the lentil detail. We also removed the cedar tree on the edge of the cut to prevent it from growing roots into the wall and pushing it over, and or getting toppled by high winds and wet soils in the winter/spring.


So here you can see a detail of the finished wall with the tree removed(and all the blackberries), and the clean out access detail for water to collect in.

Other foundations.......


Above you can see Forest building a dry stone retaining wall out of Idaho Quartzite that will finish out at 48" tall. At his feet you can see the detail of the foundation protruding 4-5". In our part of the world the inspectors measure walls height from the bottom of the first stone.

Here is a finish detail of the wall before plants went in.... The pattern language of the foundation stones is picked up with the large cap stones.


We can return to this fence that has a few unique elements incorporated to it.
This site needed to incorporate a passageway for a seasonal stream that appeared during heavy rains, and lintels above the root structure of the 'witness tree' in Shaker Village. The foundation is entirely below water water line. Here I rebuilt the wall the had failed because of the tree and a broken lintel stone. After I stripped it out, I added foundation stones which will greatly strengthen the wall. The tree however will pull it apart again over time as the roots were monsters that should have been removed. By the way... trees love stone walls because the provide shade, and harbor moisture.


In some cases their engineer, or landscape architect, specifies something a little more extreme. In this case the client wanted a dry stone retaining wall look along their man made lake in Ontario. In this project my friend had to build on a concrete foundation and  concrete wall behind the stone. The wall had large cap stones 3' x 3' x 6" thick mortared down to the stone. It was designed to show the top 12" in summer when the lake was full,  much less in the winter as it receded, but also because of the freeze thaw and heaving.


This project is being built in Bellingham Washington. Our wall was engineered in context to the 'critical slope' behind it, the sandstone bedrock, our desired finish height of 6-7', and drainage. For this project we had to remove all topsoil, and 'toe' our wall into bedrock 6". That was about 11-13" below grade! In the first image you can see our foundation stones for our granite foundation stones. Crazy right? You can see in the second image those stones protruding 3-4". Also note our drain pipes behind the walls to remove excess water content. All the gravel came out as we installed our foundation stones.

I have seen many walls built on gravel of varying depths, on asphalt, over fallen logs/boulders, and stone. Every structure built should be honored with the foundation being properly built. Why waste the time to build a structure without a solid foundation? 
As you can see every walls foundation is critical in context to the site, as well as the finished structure.

Monday, January 21, 2013

Angled or Wedge Retaining dry stone wall


It all started with an unruly slope, bad access to the street from the house, and a poorly built dry stone wall......


We started by taking up the concrete path through the trees to the street, and removing the poorly built limestone dry stone retaining wall for many reasons:
1) It was failing, 2) It had no foundation, 3) The stones were improperly sized,
4) and it was ugly.

 We had to strip it out to build a new one, so we figured we would change the grade of the lower area at the same time to make it more functional.


I did a site drawing for our client (see earlier blog post October 3, 2011)proposing new walls, stairs, a gothic dry stone arch, and pathways. I love to draw, but not super tight....

We took 25 yards of soil out from this area to bring it to the proper grade before we
we began our wall.

      Our client wanted this wall to stand out distinctly from the other work we had done, yet tie in with the same language. To do this we used the same Montana Slate materials, from a different quarry there, as well as the same stone from the dry stone retaining wall along the driveway. Functionally I needed to build stairs down from the deck to a path, which evolved to a dry stone arch hidden in the trees, to another set of stairs-which became cantilevered  to this wall.

         I had found a large beautiful piece of granite(at Marenakos in Preston Washington) for the right wall end by the stop sign. It was 9' long by 16" tall rising to 48". Our client loved this idea in the entirety and we began some 12 months ago.

          So the wild thing about this project was the staging of  80-90 tons of stone in this space, plus room for machinery, building, access to the mailbox, and keeping the city of Bellingham happy with our water runoff from the site into storm water drains. We got to know the city people quite well working here.
         
          I decided to build a set of stairs down from the deck first to gain access to the slope safely every day. From there we located the arch site in the trees, established a path to the arch, and built the 2' tall dry stone retaining wall along the path which connects the arch to the stairs. To figure out where the stairs where the cantilevered stairs were going to start, I had to set the large piece of granite and establish the line of my dry stone retaining wall with it's base course.
This picture is great because it shows our 100"long treads, wall stones for the lower wall, and in the back of the pile, a granite boulder we moved from the landscape to split into 3 stones: 1 for a 2 ton base stone for the column of the arch, and the 2 other smaller pieces for gate posts(stainless steel forged gate designed and fabricated by Altility here in Bellingham).....


  So once that line was established we started with the cantilevered stairs and the retaining wall. I knew we needed to get a lot of big material up on the slope by hand, and with machinery, for the arch so we started building the cantilevered stairs up to the arch.


*Side note here...
This is the medium long version of this whole scope of work for this front area by the way..... Which lead up to the final angled/wedge dry stone retaining wall.

After we had built all those details over some period of time, we could finally begin our wall. We needed the cantilevered stairs, and dry stone retaining wall  in to function as our wall end on the left.

So we followed our rules......Each stone in these structures has these rules applied, and then with the angled/wedge wall with get to apply the exceptions!

It begins like all dry stone walls built to DSWA standards...
1)Length in for all stones
2)One stone over two, and two stones on one
3)Largest stones go one the bottom of the wall
4)Stones are laid level and solidly
5)Build to the string line, and heart well!

So we started with 5-6 pallets of 2-3" thick Montana Slate. We set up our wooden bankers to begin squaring up the stones, and sorting for the build.

Before we could start building this I had to decide what angle we were going to lay the stone to. I didn't want it to look like it was slipping, or that it was laid casually. We decided a 60 degree angle looked the best and committed to it for 50' long by 4' tall....
You can't 'see the forest for the trees' when you start a wall and this is really when everything seems off.

And then BAM! It finally snaps together once a pattern language is established!
From the side you can see the technique...
Another beautiful detail about these walls is the top course. It creates a very beautiful line...

So here we are almost done.... silt fence still up, bankers have moved with us down the wall, patterns mostly revealed, seasons changing...


So here is how we end this wall. I had the granite stone on top for
about 12 months. It is about 30" long into the wall.

The view from the deck above the wall.

The finished wall from the street. What a journey worth taking!

To build these features, I needed the collaborative help of many people, but specifically I need to thank these Craftsmen that worked closely with me ... Kevin Hettick, Gary Henderson, John Grablewski, Sean Donnelly, and Garrett Thornton for helping to realize it.

Time to move on to the back yard and other details with stone....


All images copyright of BorowedGround LLC@
                                      

Saturday, August 4, 2012

Dry Stone Gothic Arch project


Dry Stone Gothic Arch

I have to start here with these cantilevered stairs before I talk about the arch. These wind up the hill to the arch with the retaining wall eventually turning into a low fence/ bench seat before the arch.


Add caption
When I designed this detail I wanted our stairs and retaining wall to wind like a ribbon up the hill-around the trees-into an arch- and then into a low 24" tall retaining wall that ran up hill to another set of stairs.


This is my foundation on the left side for the dry stone arch. It is about 24"tall and the beginning of the low dry stone retaining wall. The piece of granite on the right came from a large boulder on site that we split down, leveled off, and shot up the hill with an extension fork lift. It weighs about 2 tons.
On a side note here are the other 2 pieces of granite we used for gate posts up by the house. We are lucky to have a black smith in Bellingham to collaborate with, Arron Loveitt of Altility.
altilityartstudio.com

Here is the gate he designed. It covers up the gas meter, and invokes a sense of private space. This granite split beautifully using feathers and wedges into three  usable pieces. 

You can see the retaining wall taking shape in context to the wall/arch/column.
At about this point I wanted to add another detail for our client in this arch for a finer detail. We wove in an Ogee Arch cut from Penn. Blue stone. On the lintel we cut in the phrase... 'Land of the Free & Home of the Brave'. It looks beautiful. We also cut in holes for recessed lights within it. What is also nice about adding this detail is that it gives the arch another column that accentuates the voussoirs(the stone for the corners of the gothic arch).


We finally got the column up to height to insert our form.
Up with the form, and the scaffolding! You can see the top step and bench wall all tied together before we cut our cap stones and installed them. All these stones are hand carried up the hill by the way! We spend a lot of time laughing at each other under some absurdly heavy stone that we carry up each day. 80% of the stones find a home in the project as a wall stone... the rest wind up as hearting(fill stone) having fractured under our hammer....

Here is a detail of the Ogee Arch. You can't read the inscription because we just rinsed the wall down.
Here we are looking down from the upper path, by the gate. We installed the arch here in the clients landscape so they would have visual access to it from the bedroom windows.


The arch is coming up nicely, and I am super happy with how level I have been able to keep my column courses. At almost 7' in height it barely moves when we push on it from the side. We put our cap stone on the low bench/fence wall. It is not tied into the arch at all. Life on the scaffolding has been challenging to say the least.
So...
Here we are as of yesterday. I am cutting cap stone for the top of the wall for more weight, to keep water out of the wall, add height and remove the neighbors landscape from view. I am planning on adding a couple layers of turf flipped over for the top to plant native plants on. It should look older and pretty cool when we are done....
I think we are at about 7' or so  below the caps.

And we are still looking for our key stone for the arch....

We found it sitting right by our truck!
Here Gary Henderson is drilling holes to split off 1/3 of this boulder
to generate enough material we can continue to split into our keystone.

You really need to split off a larger chunk than you need, so as you continue to shape it, you have enough mass on the material you want to remove to control it evenly. That was our split with 'feathers and wedges'... 5 setups to reveal the key stone. Patience and consistency lead to great results.

View from the cantilevered stairs looking up at the arch.

So there we are! The arches turned out great. What a journey! I love that we can take a few basic rules-for dry stone walling, apply exceptions to those rules & discipline, and build exceptional details in the landscape.
Here we are looking the other direction. I love how it feels like two totally different arches from each side. Essentially they are, as visually you have totally different language in the landscape that informs the arch and the viewer.

I like how dramatic this is... subtly revealing other details.


The Chapel Project 2019-202?

The Chapel A replica of a 14th century Irish chapel-St. MacDara's island Mid-winter of 2018/2019 a client contacted me in Sat...